Philippines: Visa and Entry Requirements for Tourists in 2026
The Philippines is a beautiful country that’s easy to visit for most tourists. Visitors from many countries (including the US, Canada, UK, Australia, EU nations, and many others) can enter without applying for a visa in advance and can stay for up to 30 days. If you want to stay longer, you can easily extend your stay by another 29 days while you’re already in the country.
Before you go, there are a few important things to know about entry requirements and the current visa rules. In this article, we’ll clearly explain everything you need to know about entering the Philippines and how to extend your visa — now even possible online.
Visa-Free Entry Requirements
- A valid passport (must be valid for at least 6 months)
- Return or onward flight ticket
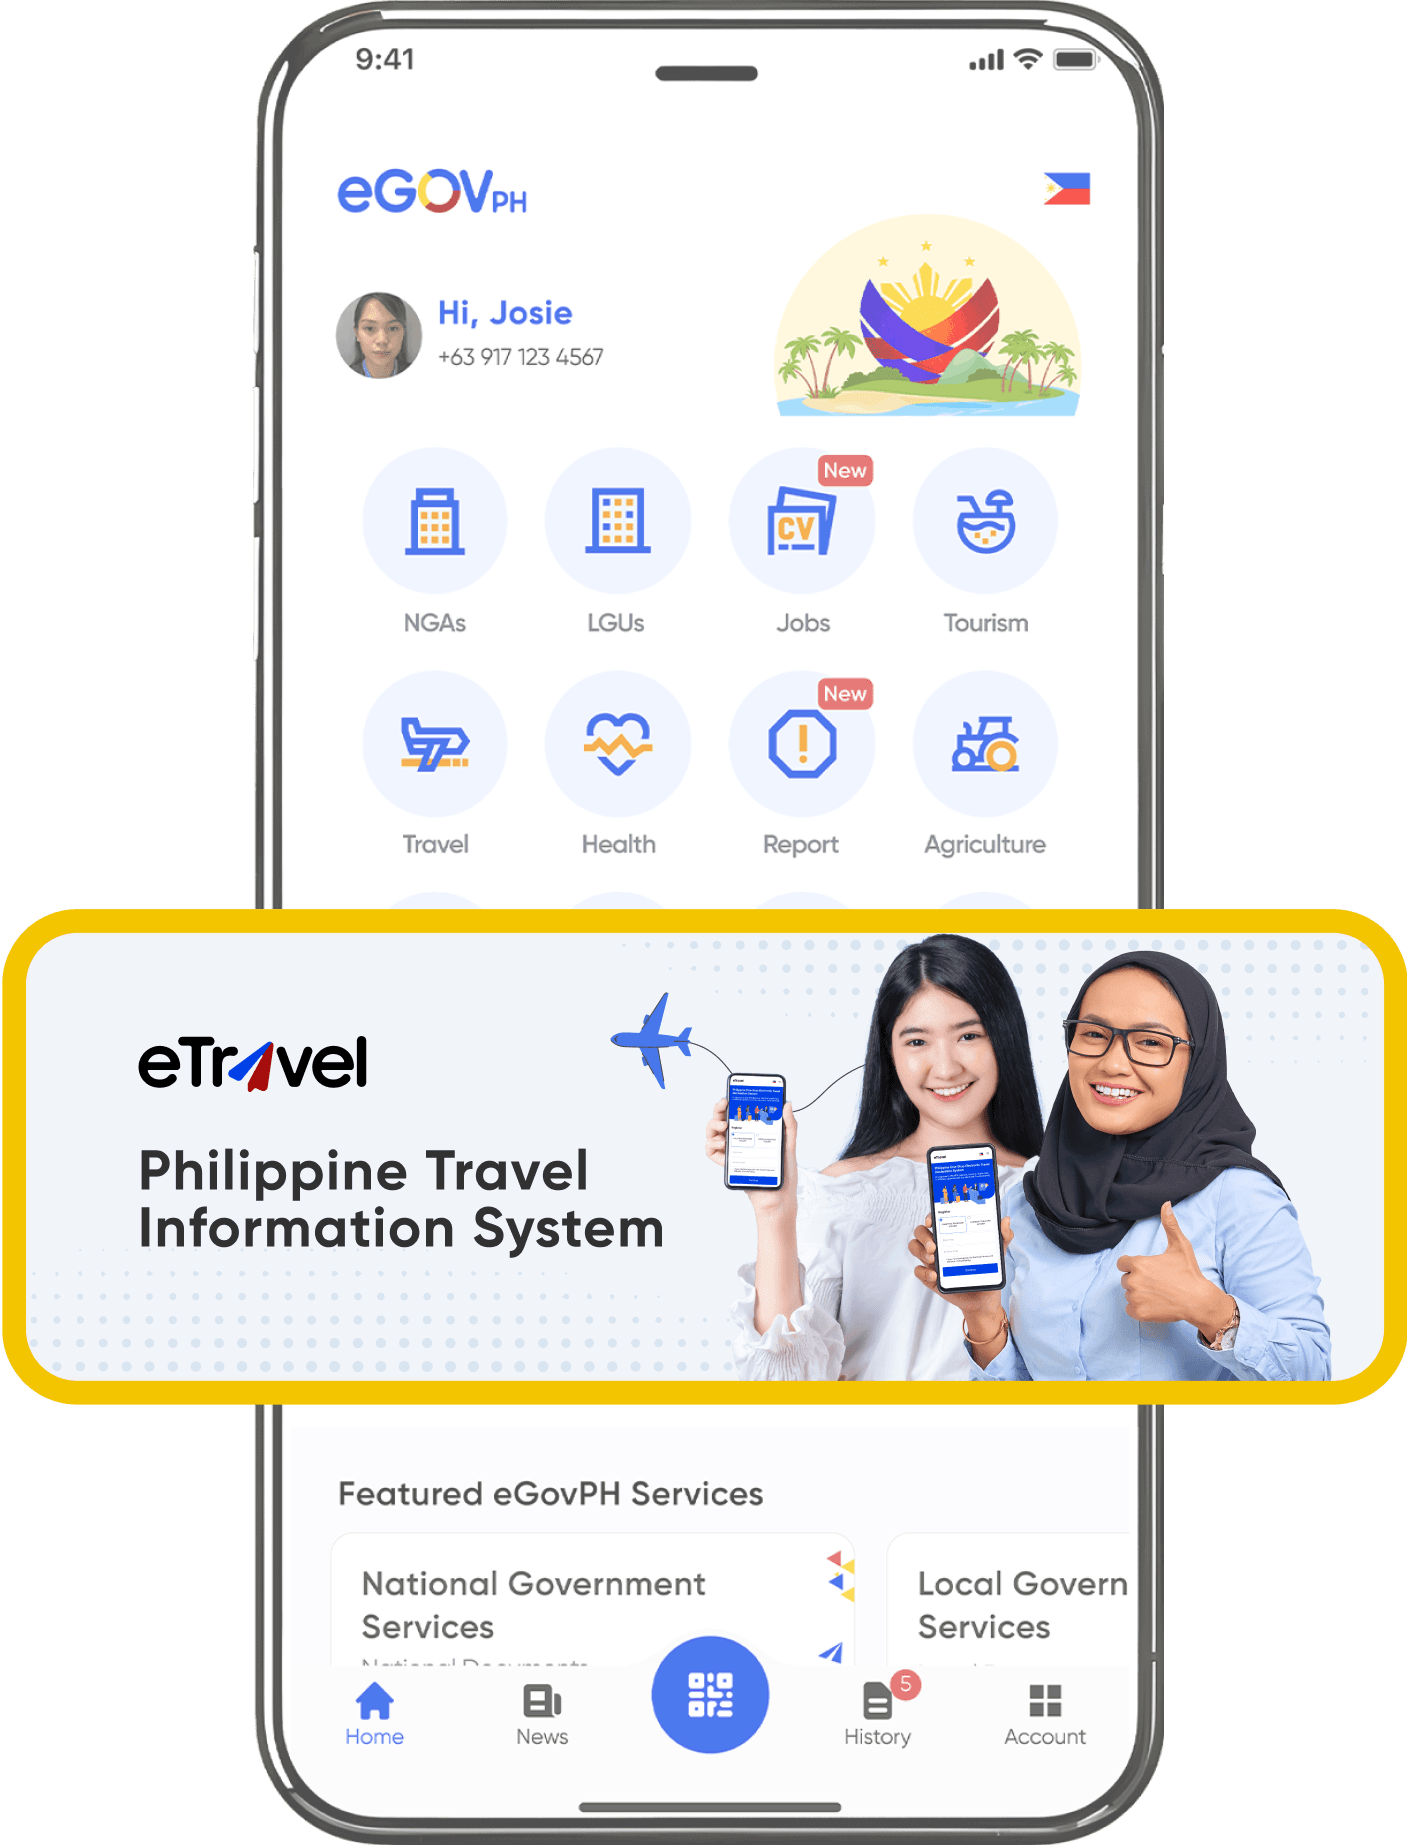
- Registration with the eTravel system
30 Days Visa-Free Entry to the Philippines
Most travelers can enter the Philippines for tourism purposes without a visa and free of charge. When you arrive, your passport will be stamped, granting you a visa waiver (also known as visa on arrival) that allows you to stay for up to 30 days.
To make sure your entry goes smoothly, there are a few requirements you should keep in mind:
- eTravel registration: Before your trip, you must register through the official Philippine eTravel system.
- Valid passport: Your passport must be valid for at least 6 months from the date of entry.
- Return or onward ticket: You’ll need to show proof that you’re leaving the Philippines within 30 days — either a return flight or an onward ticket to another country.
Not sure yet when exactly you’ll fly back? No worries — there’s a simple workaround that lets you enter the Philippines without a real return ticket. We’ll show you how it works here.
You can find a full list of nationalities eligible for 30 days of visa-free entry here.
Before You Travel: Register with the Philippine eTravel System
Before flying to the Philippines, you must register with the Philippine government’s eTravel system and complete the arrival form. This registration has been mandatory for all international travelers entering the country since December 2022. The eTravel system is part of the Philippines’ border control, health monitoring, and contact tracing procedures. You’ll be asked to provide basic travel information, details about your stay, and some health-related data. The process is quick and straightforward — it only takes a few minutes to complete.
Good to know: You don’t need to register again when leaving the Philippines — the eTravel form is required for entry only.
In Short
When to register: From 3 days up to 24 hours before departure
Where to register: On the official Philippine eTravel website: https://etravel.gov.ph
What you’ll receive: A confirmation and a QR code
When Should You Register and Fill Out the Arrival Form?
Earliest: 3 days before departure
You can register with the eTravel system up to 72 hours before your flight. It’s a good idea to do this early to avoid any last-minute issues or delays.
Latest: 24 hours before departure
Make sure to complete your registration no later than 24 hours before departure, as your information may not be processed in time otherwise. Usually, though, you’ll receive your confirmation and QR code within a few minutes after registering.
Where Do You Register?
Visit the official website of the Philippine eTravel system: https://etravel.gov.ph
If you don’t have an account yet, you’ll need to create one first. After that, you can fill out the arrival form directly through the portal. Once you’ve completed the form, you’ll receive a confirmation and a QR code. Make sure to either print the QR code or save it on your phone, as you may be asked to show it upon arrival in the Philippines.
Which information do you need to provide in the arrival form?
Before you start the registration and fill out the arrival form, you should have the following information and documents ready, as these details need to be entered in the form:
- Passport
- Digital photo
- Flight details
- Address of your accommodation in the Philippines
Entering the Philippines without a return ticket
If you don’t yet know when or where you’ll be traveling next when entering the Philippines, you can use a so-called onward ticket from OnwardTicket.com* for around 16 € / USD. An onward ticket is a real, booked flight ticket with a reservation number (PNR code), but it’s only valid for a limited time and then automatically expires.
Basically, you’re renting the ticket for up to 48 hours – more than enough time to pass immigration. This way, you meet the entry requirements for the Philippines without having a fixed return or onward flight, a clever trick that many backpackers and long-term travelers use.
You can easily book the ticket one day before your trip (since it’s valid for 48 hours), or in an emergency even last minute at the airport, as long as you have internet access.
When do you need to show a return ticket for the Philippines?
In most cases, your return or onward flight ticket is not checked upon arrival in the Philippines, but already during check-in at the departure airport. The airline is required to make sure that you meet the entry requirements of your destination country – and for the Philippines, this includes proof that you will leave the country within 30 days. The ticket contains a PNR code, which allows the airline to verify the reservation.
If you are unable to show a return or onward ticket, the airline may deny you boarding. In some cases, immigration officers may also ask for proof of onward travel when you enter the Philippines.
Even though proof of onward travel is officially required for entry into the Philippines, it can occasionally happen that you are not asked for it at all. In that case, the responsible staff simply didn’t do their job properly and you would have bought your onward ticket for nothing. You can, of course, take the risk and try to enter the Philippines without a return ticket. You can still book an onward ticket on the spot if you are asked for one – as long as you have a stable internet connection.
Note:
Even though it is officially possible to extend your visa in the Philippines, airlines and immigration authorities do not accept this as a valid reason at the time of entry. Planning a visa run or a later visa extension does not replace the need for a return or onward ticket.
Step-by-Step Guide

Booking an onward ticket is quick and easy. To make sure you’re well prepared for entering the Philippines without a return ticket, we’ll guide you through the process step by step so you can book an onward ticket and comply with the Philippine entry requirements.
- Visit the website: Go to OnwardTicket.com*.
- Select your itinerary: Enter your preferred departure airport, destination airport, and travel date.
- Enter passenger details: Add your full name and include additional passengers if required.
- Choose your options: Select when you would like to receive your ticket.
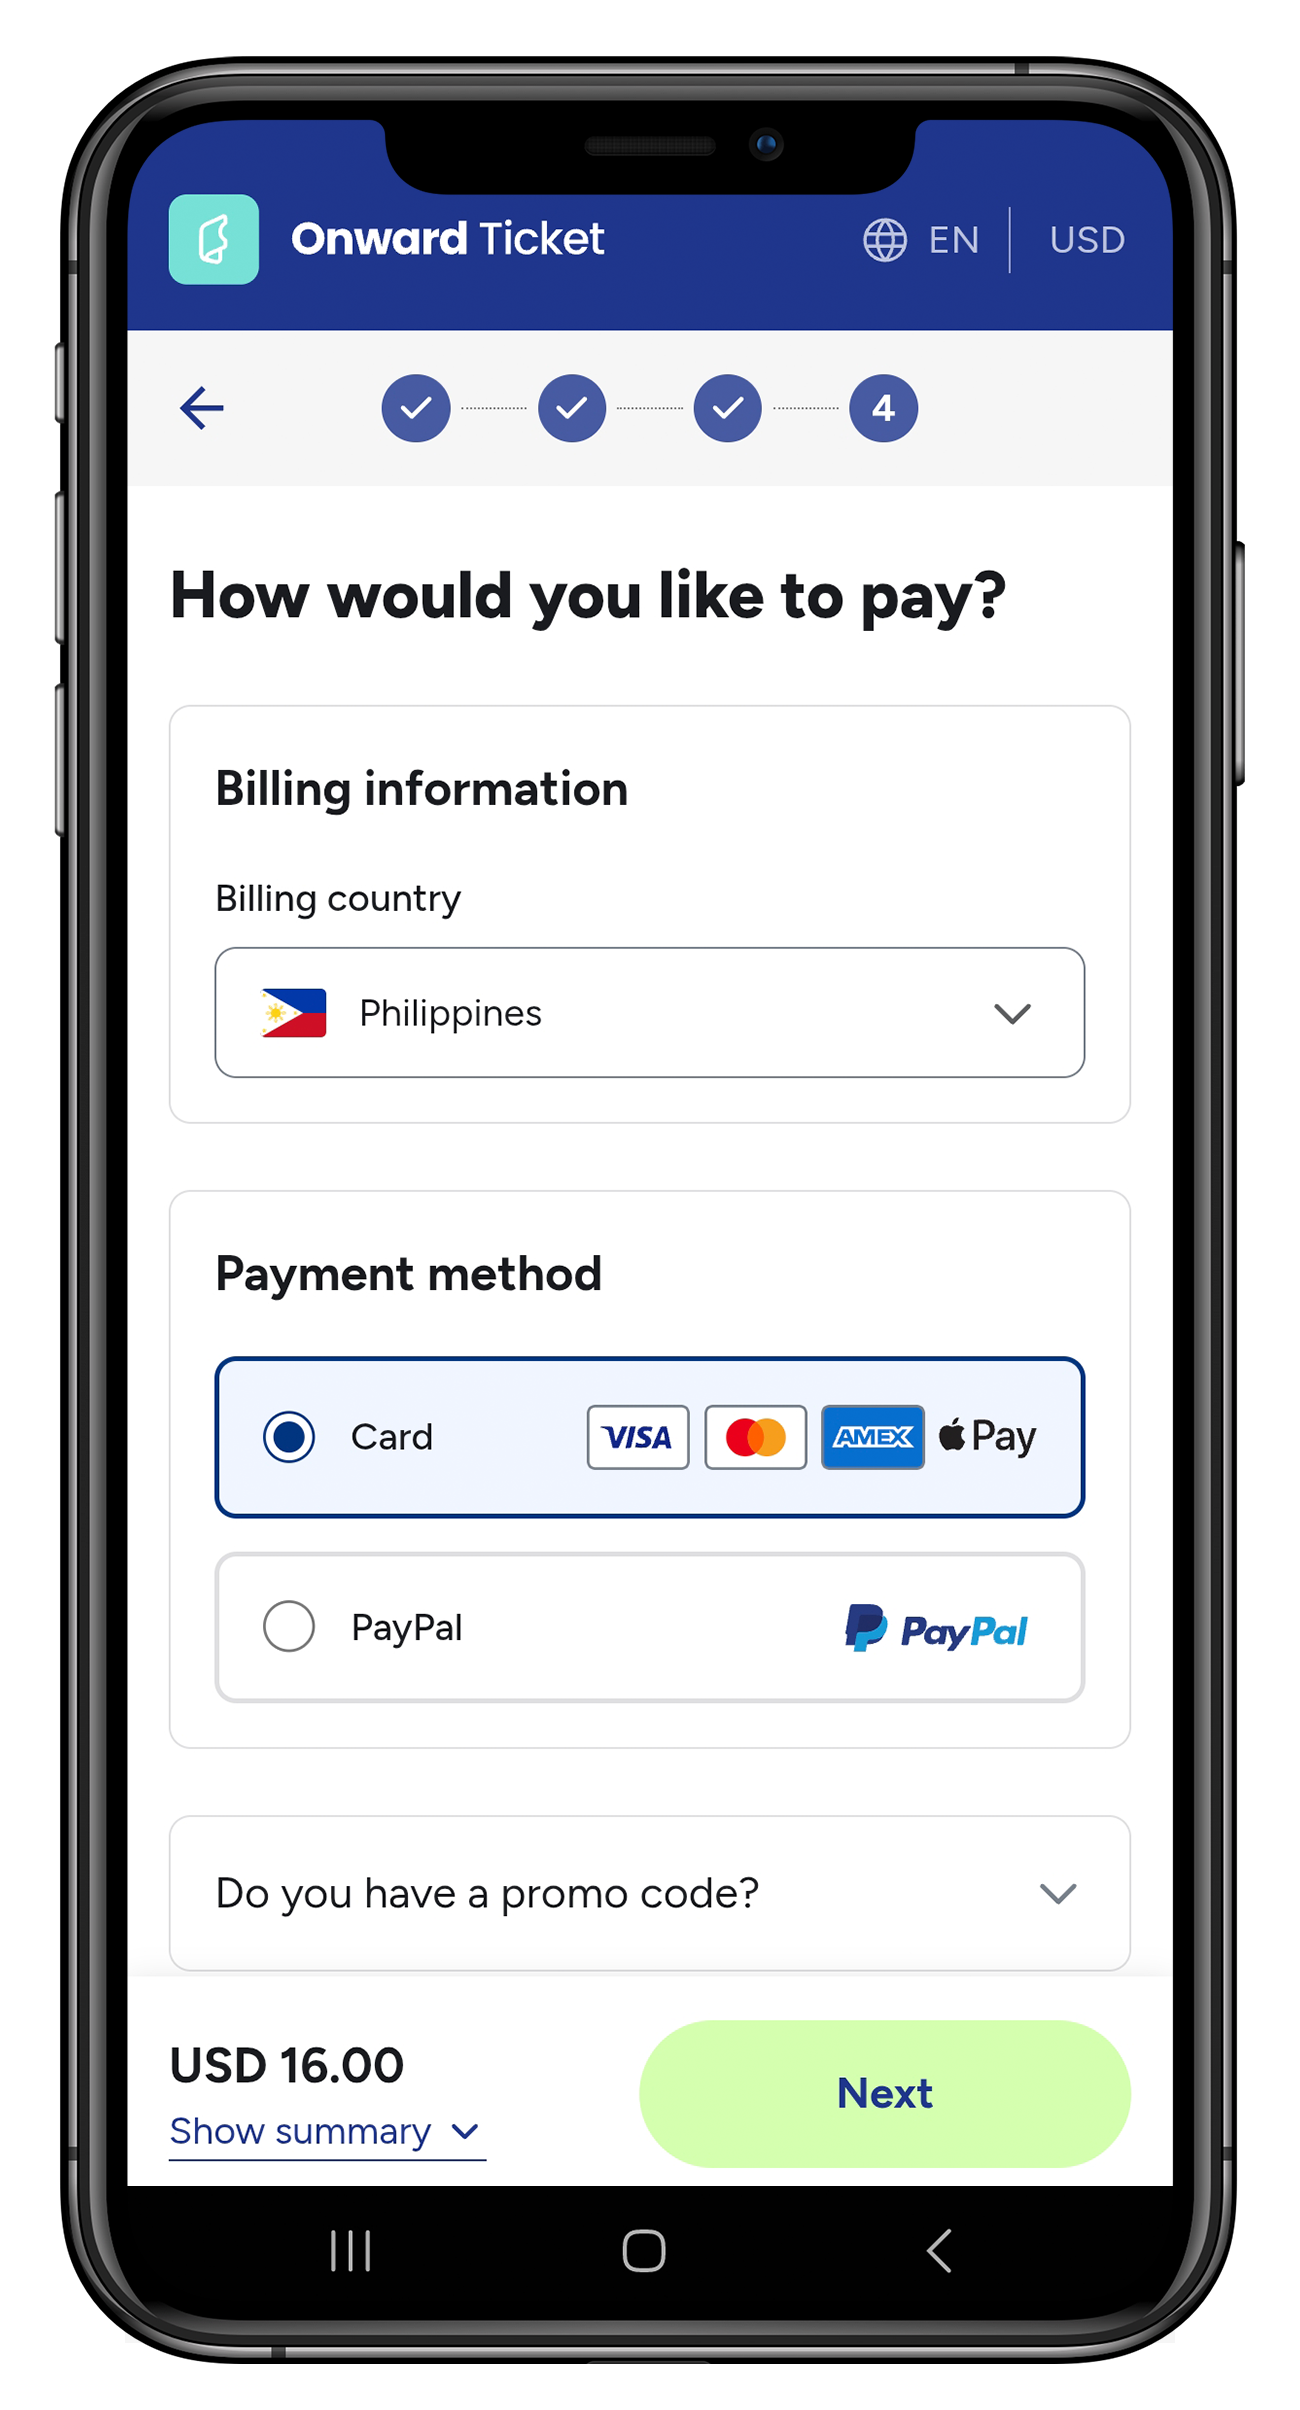
- Payment & ticket delivery: Pay securely by credit card or PayPal. Within one minute, you’ll receive a real, verifiable flight reservation directly in your email inbox.
Important: Make sure you have a stable internet connection during the booking process—especially if you need the ticket at short notice.

To meet the entry requirements for the Philippines, all you need is a flight ticket—so simply select “One-way.”
The flight must take you out of the Philippines, for example to Singapore, Bangkok, or back to Germany. The destination itself doesn’t matter to immigration authorities—as long as you can prove that you will leave the Philippines within 30 days.
As your departure airport in the Philippines, you can choose Manila (MNL) or Lapu-Lapu / Cebu (CEB). The specific flight connection will be selected automatically for you, so there’s nothing you need to worry about.
Ideally, choose a departure date that is around 2–3 weeks after your arrival and not on the very last day of the 30-day stay allowance.
You can book onward tickets for up to five people in a single booking.
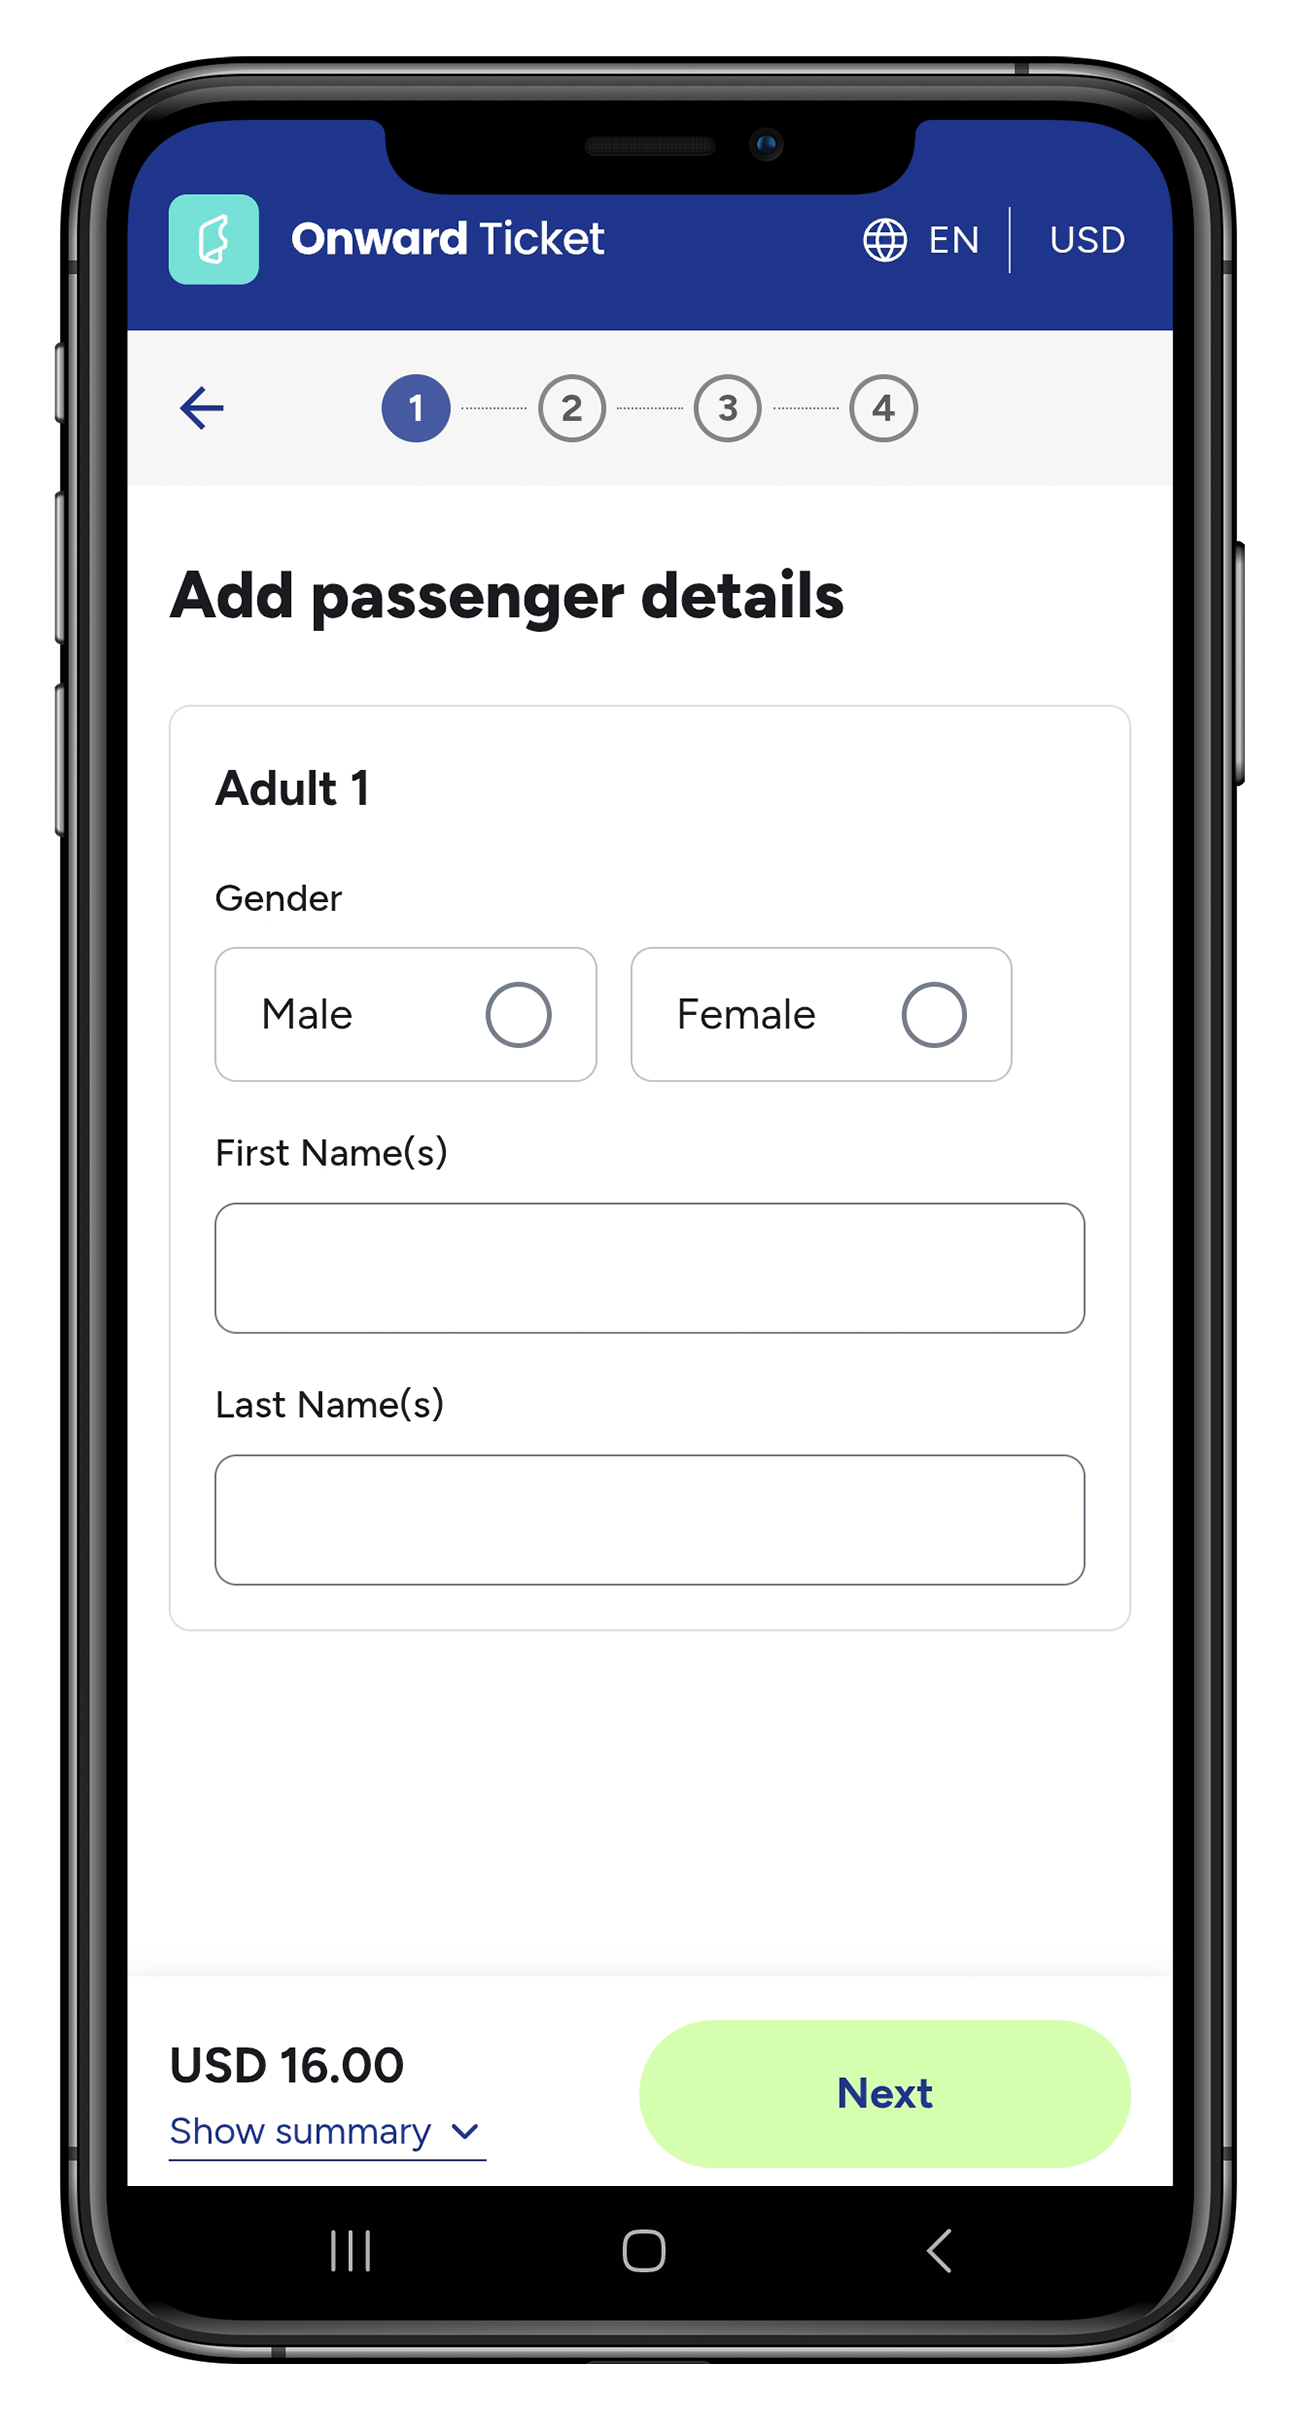
Make sure to enter your name exactly as it appears in your passport.
In the top right corner, you can select the payment currency, choosing between euros (EUR) and US dollars (USD).
The price for a standard onward ticket is €16 or $16 USD. If your bank doesn’t charge extra fees for payments in US dollars, you can save a bit by choosing the USD option, as the US dollar is currently weaker than the euro based on the exchange rate.
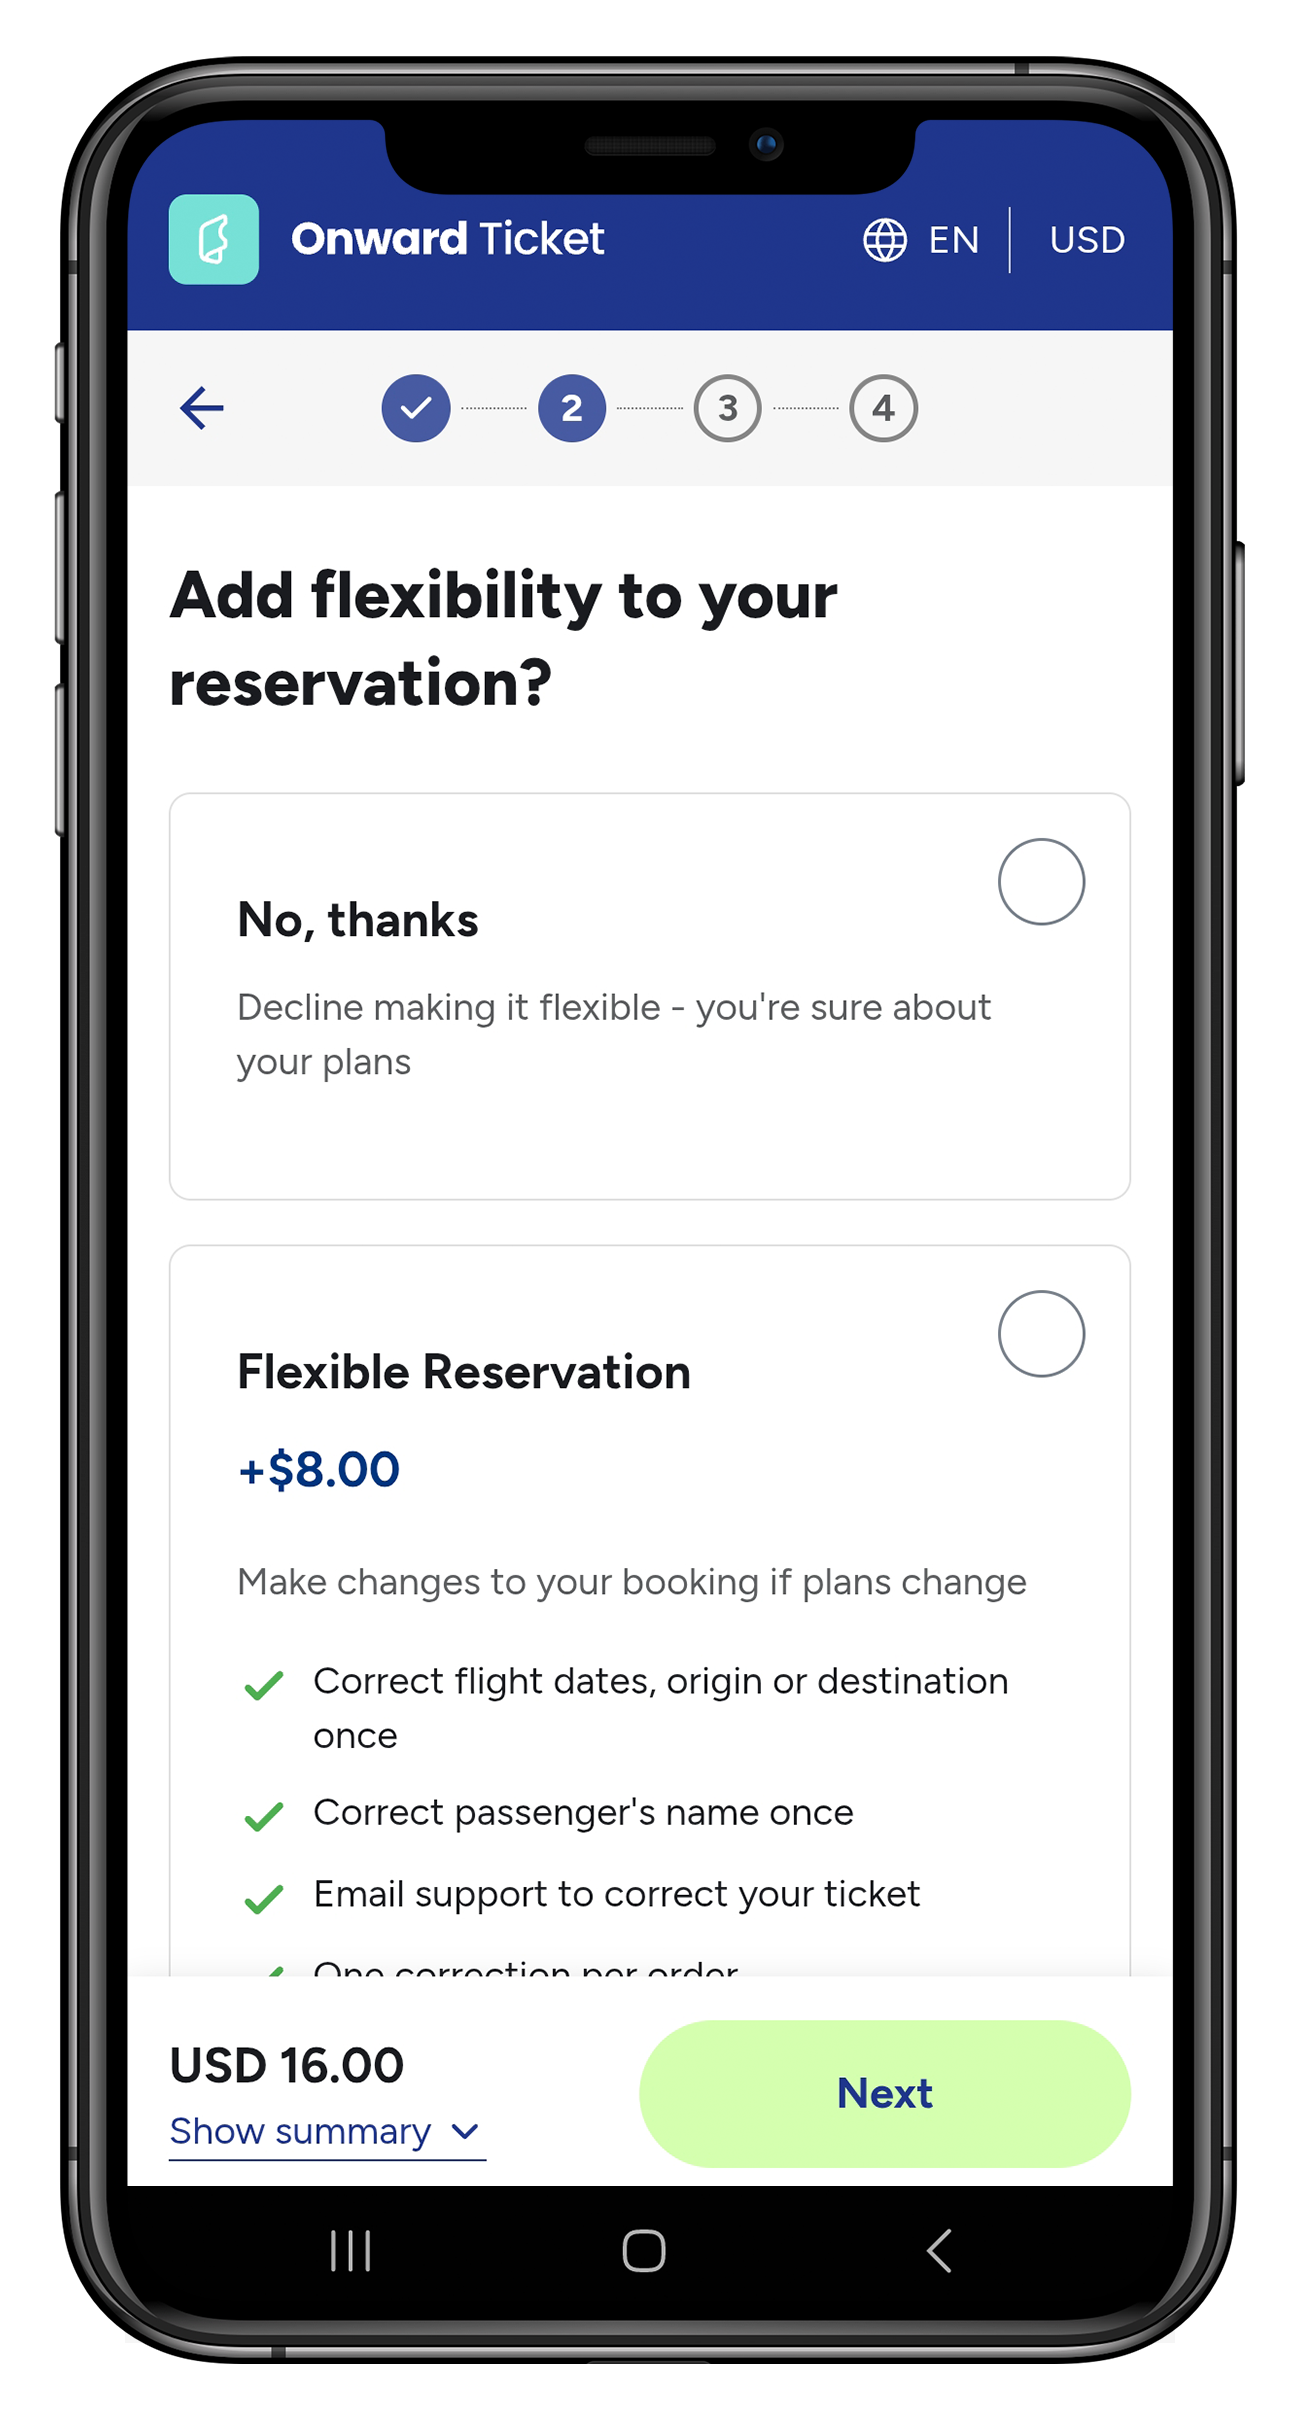
If your travel dates are already fixed, you usually won’t need the flexibility option.
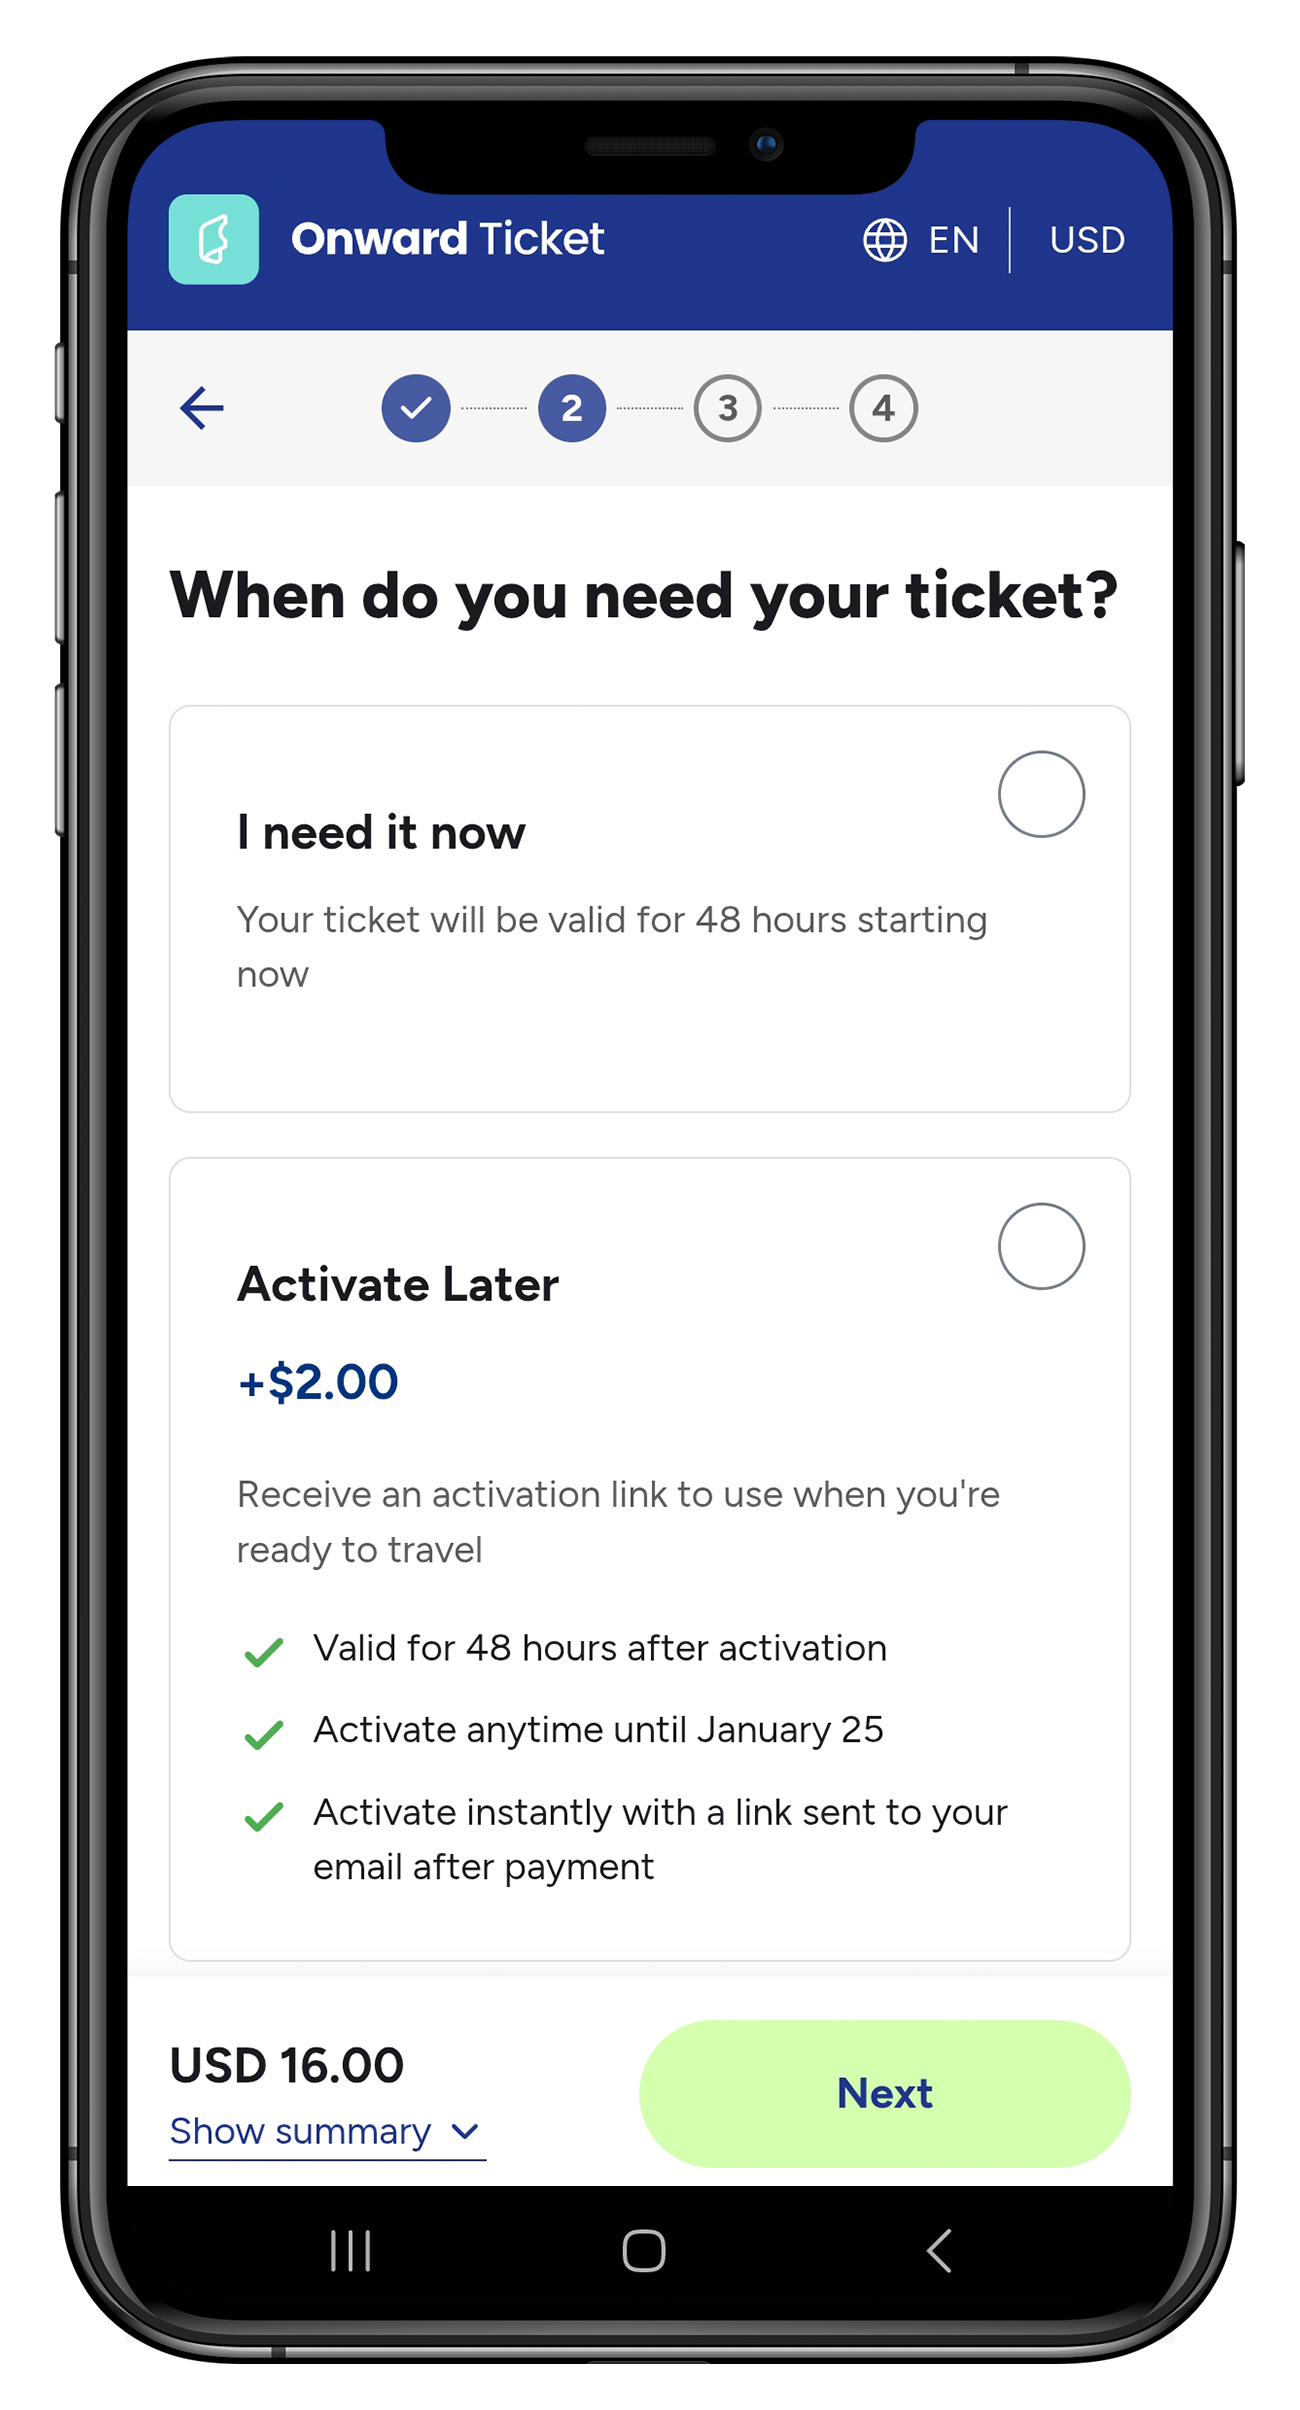
When you select “I need it now,” your onward ticket is issued immediately after booking. The flight reservation is then valid for 48 hours and will be automatically canceled afterward. We recommend choosing this option and completing your booking one day before your departure.
Alternatively, you can select “Activate later.” In this case, you’ll receive a link by email after booking, which allows you to activate your ticket at a later time.
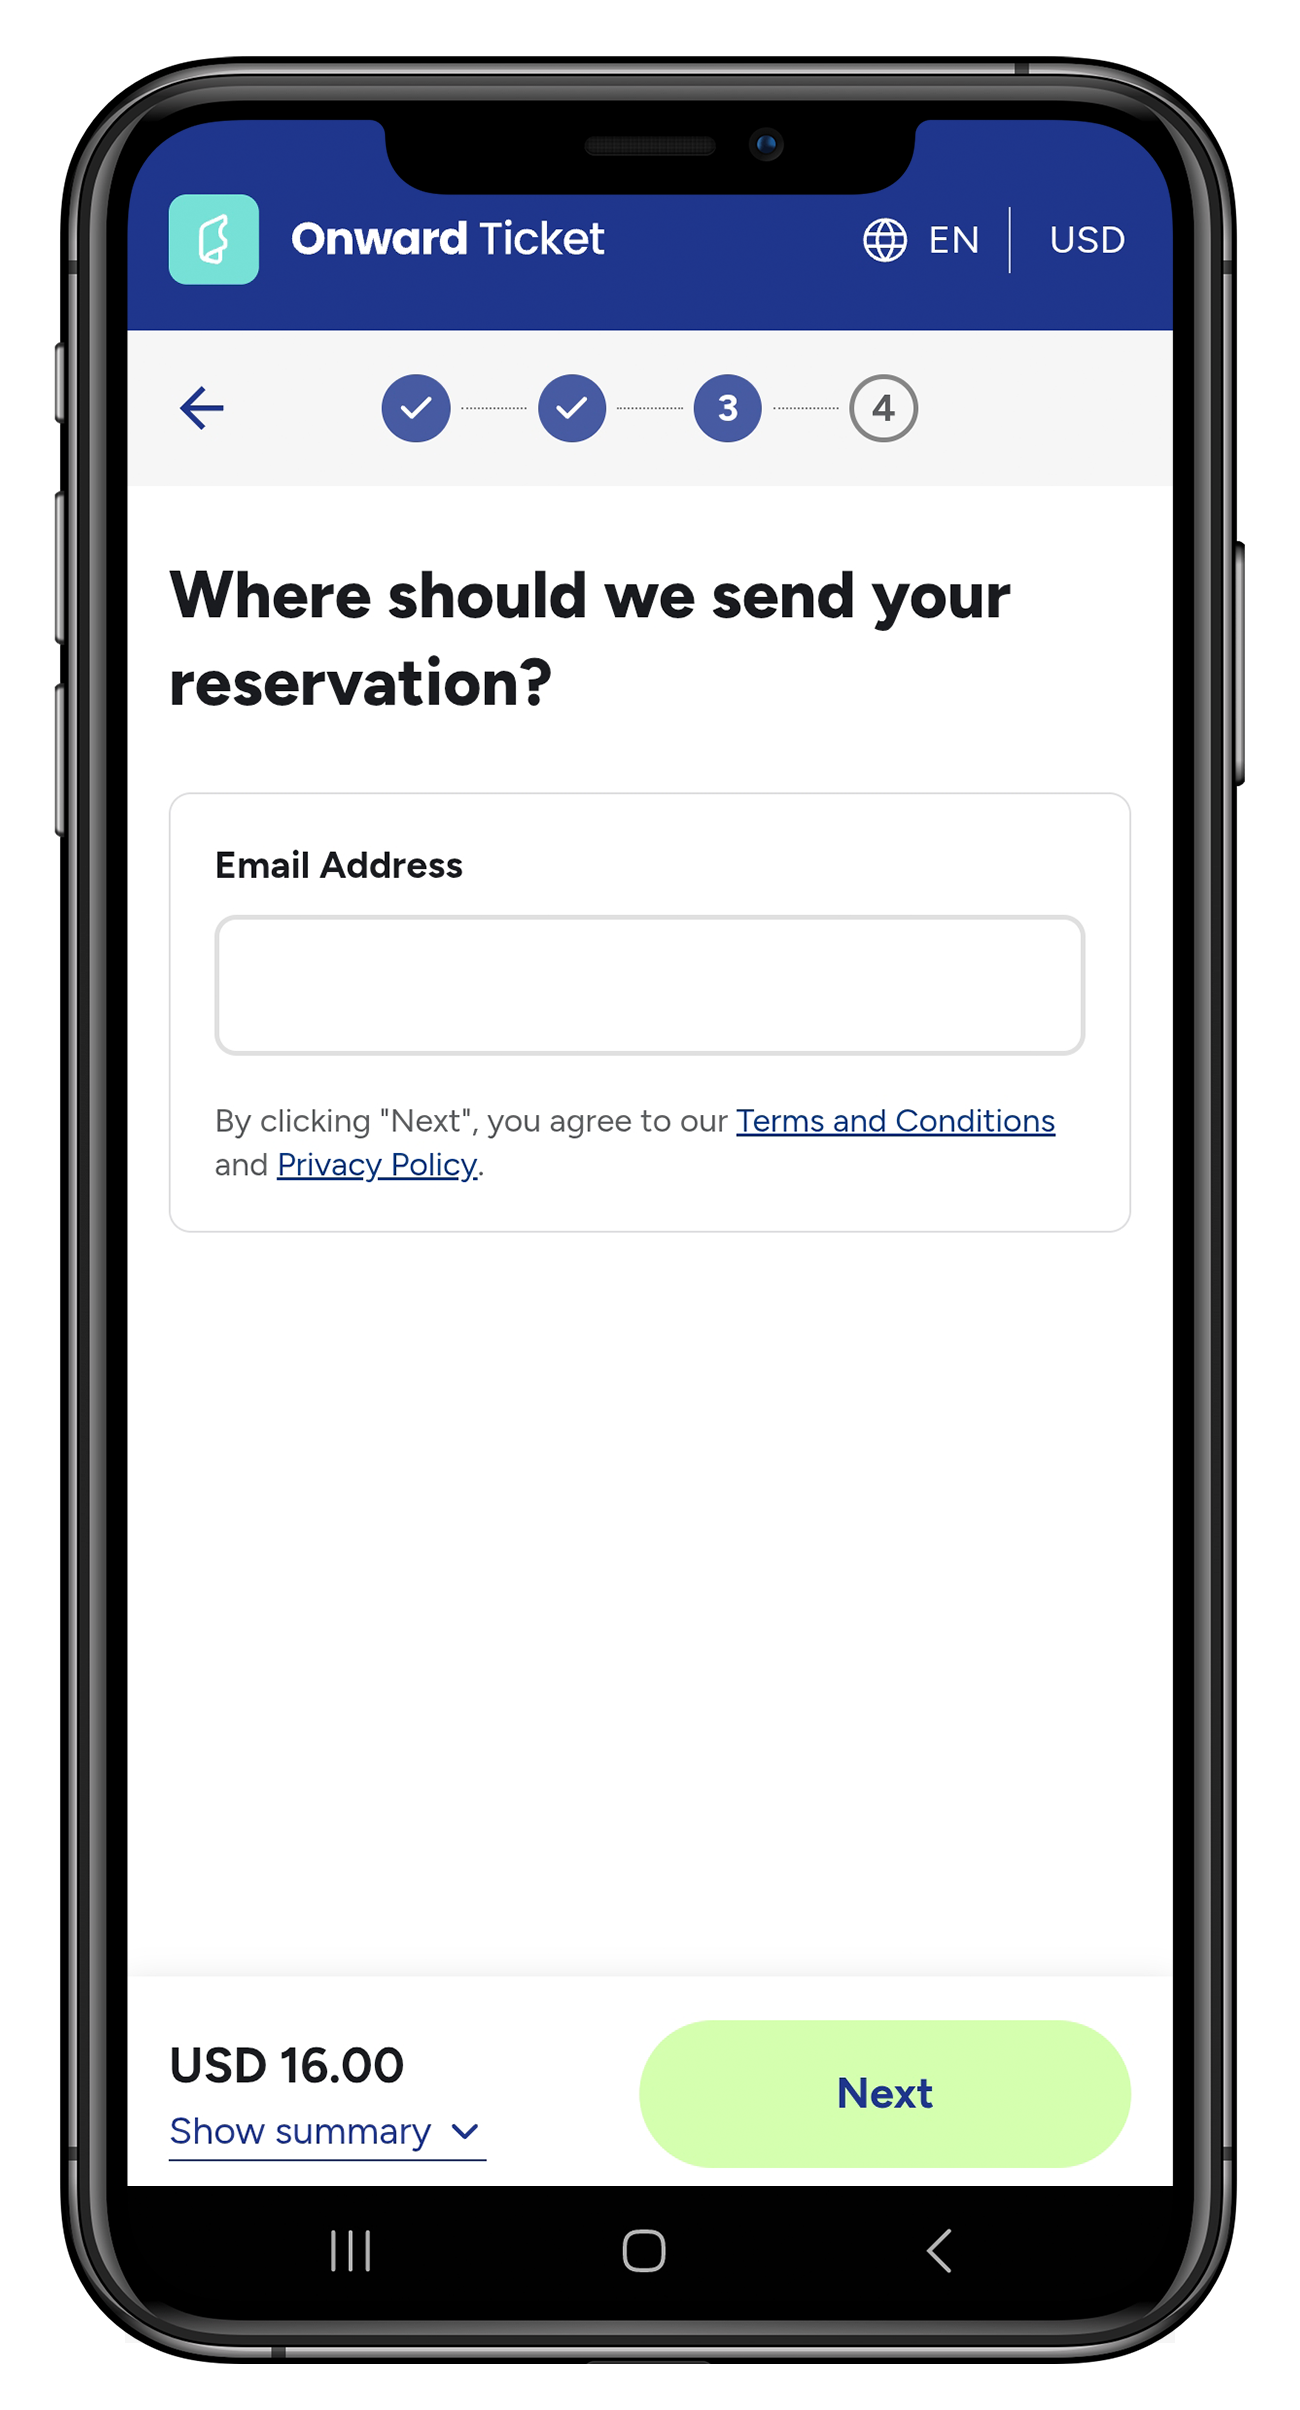
The onward ticket will be sent to the email address you enter here immediately after payment. After entering your email address, you’ll see a booking summary before proceeding to payment.
With the promo code “betterbeyond”, you’ll receive a 5% discount on your booking at OnwardTicket.com.
After payment, you’ll receive a PDF file with your onward ticket within one minute.
After 48 hours, your reservation will be automatically canceled, so there’s nothing else you need to do.
Beispielticket

Your onward ticket includes your travel itinerary and a real reservation number (PNR code). This allows any airline to verify the booking.
Even though it’s often referred to as a “flight ticket,” it’s technically not an issued airline ticket, but a verifiable flight reservation. That means you are genuinely booked on the selected flight.
Extend your Philippine Visa Online – for an additional 29 days
If you entered the Philippines as a tourist and received a 30-day entry stamp upon arrival (Visa on Arrival or Visa Waiver), you can extend your visa online for an additional 29 days. This option is available for your first extension, allowing you to easily extend your stay from 30 to a total of 59 days. The process is quick and straightforward, and you don’t need an agency to handle the extension for you. Here, we’ll show you all the essential steps to extend your visa online in the Philippines.
Important: This applies to a standard tourist entry (30-day entry stamp in your passport) and does not apply if you entered the Philippines on a different type of visa.
When and Where Should You Extend Your Visa?
Since summer 2023, it has been possible to extend your Philippine visa for an additional 29 days through the Bureau of Immigration (BI) online portal. The first extension currently costs 4,070 PHP (around $68.83) and was recently increased by about 1,000 PHP in July 2025. Usually, the online extension is processed within a few minutes or hours, but it can take up to 3 days, and in rare cases even longer. Therefore, it’s recommended to apply for the extension at least one week before your initial 30-day stay expires.
You can also extend your visa in person at a local Bureau of Immigration (BI) office in the Philippines. For this, you need to go there personally, bring your passport, and allow some waiting time. In most cases, you’ll receive your visa extension on the same day. The cost is the same as the online option, but you cannot pay by credit card at the office – only in cash, in Philippine pesos.
How to Extend Your Visa Online
To extend your Philippine visa online, you first need to register on the Bureau of Immigration (BI) online portal: https://e-services.immigration.gov.ph/
You will need:
- A valid passport
- A working email address
- A payment method (e.g., credit card)
Note:
The BI online portal can only be accessed from the Philippines or via a suitable VPN. You can only extend your visa after you have already entered the Philippines.
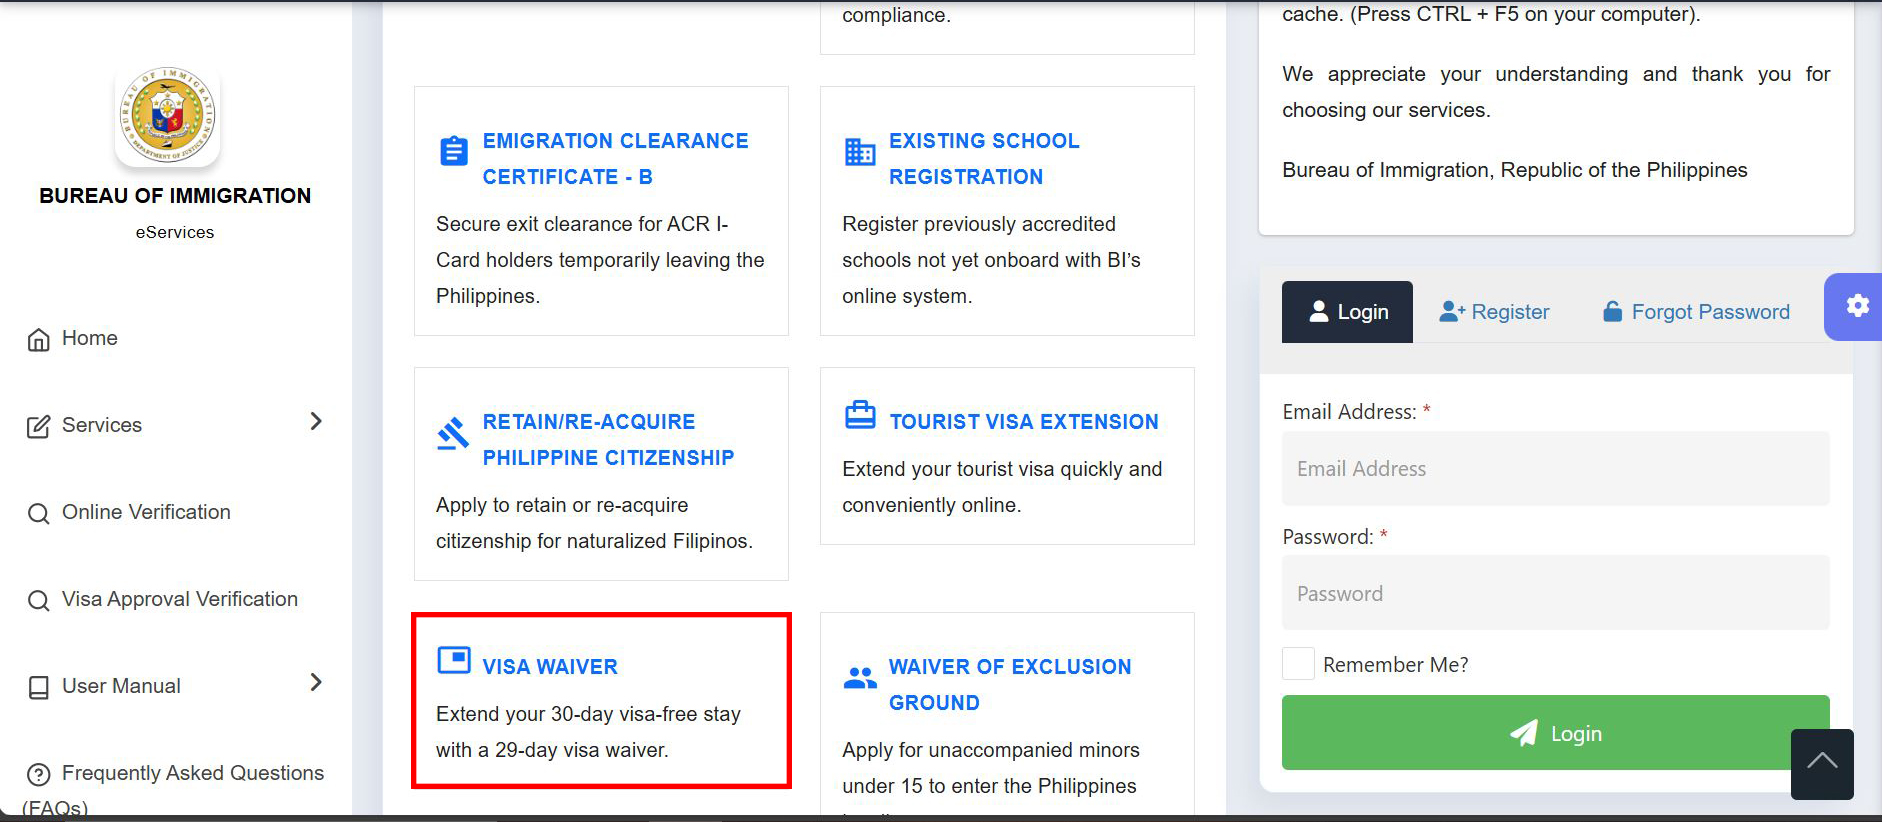
Once you’ve registered and logged in, select VISA WAIVER on the homepage. Alternatively, you can go to the left-hand menu, click on Services, and then select VISA WAIVER. This is the correct option if you received a 30-day entry stamp upon arrival (Visa on Arrival or Visa Waiver).
Do not select TOURIST VISA EXTENSION. This option is for a second extension after the initial VISA WAIVER extension and is significantly more complicated and expensive.
Next, enter your personal details and select Admission Type: EO408 – 30 DAYS and Length of Extension: 29 DAYS VISA WAIVER.
If you receive an error message, it’s usually because the information you entered doesn’t exactly match the details in your registration or in your passport – for example, if you didn’t include your middle name. Simply try again using the exact details.
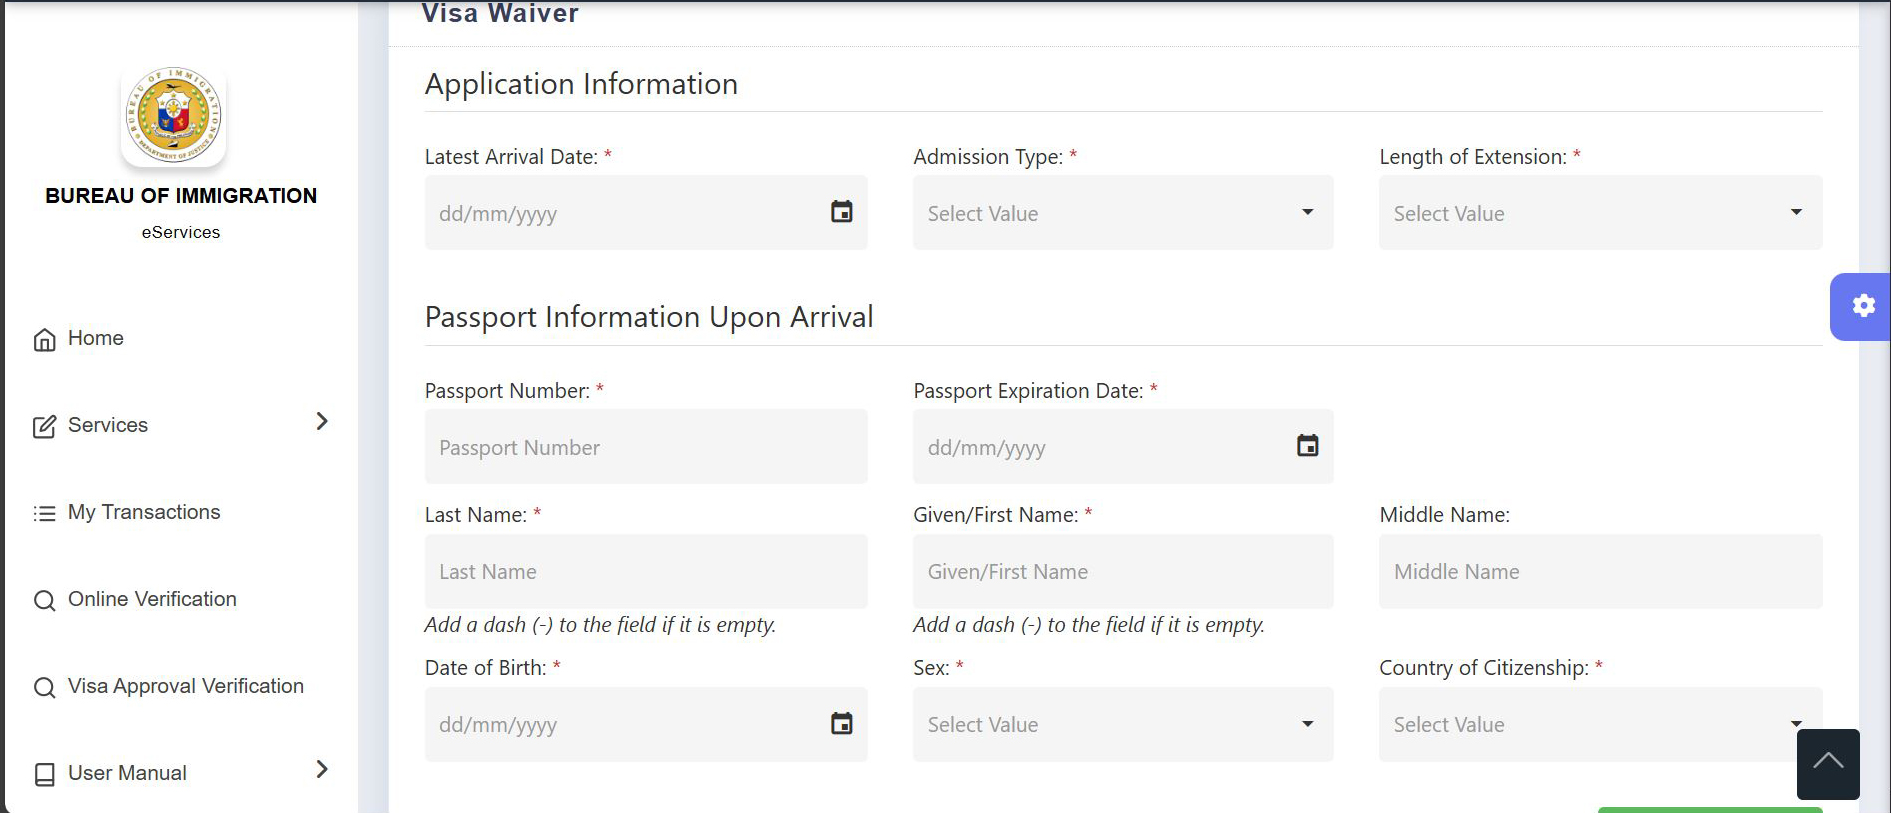
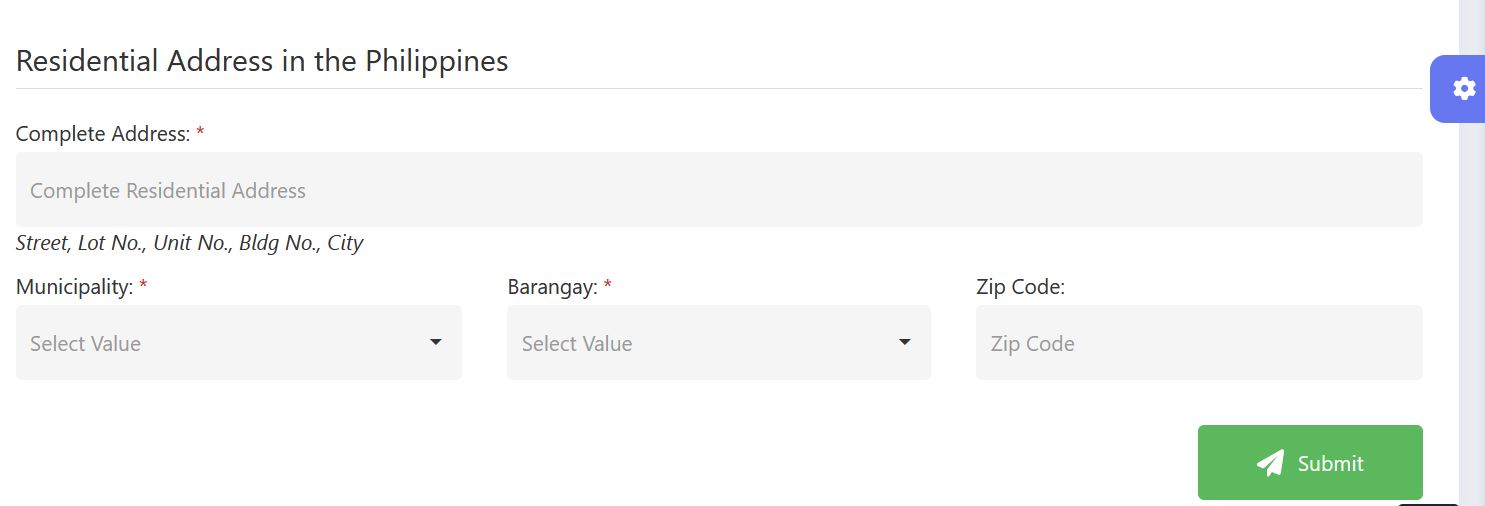
Since 2026, you also need to provide your place of stay in the Philippines.
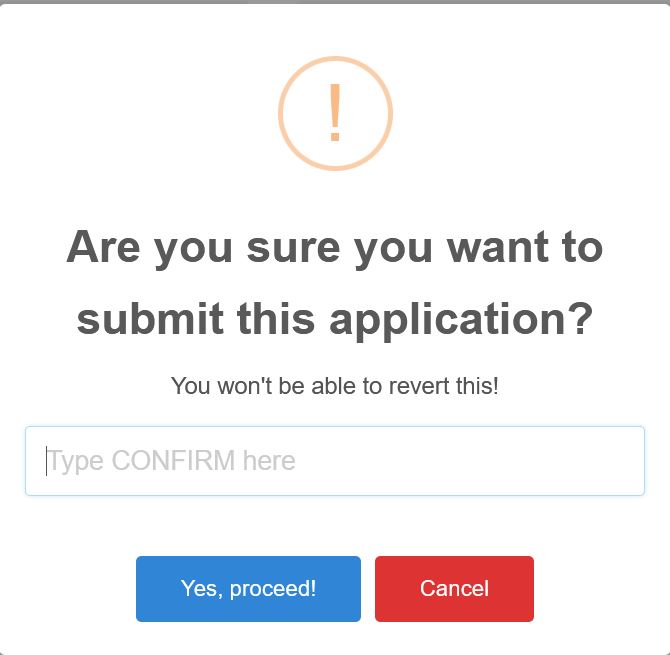
Next, you will be asked to confirm whether you really want to submit your application, and you’ll be reminded that no changes can be made afterward. If you’re sure, type CONFIRM in the designated field and click Yes, proceed!.
After successfully submitting your application, you will be prompted to make the payment and will see a summary of the total costs.
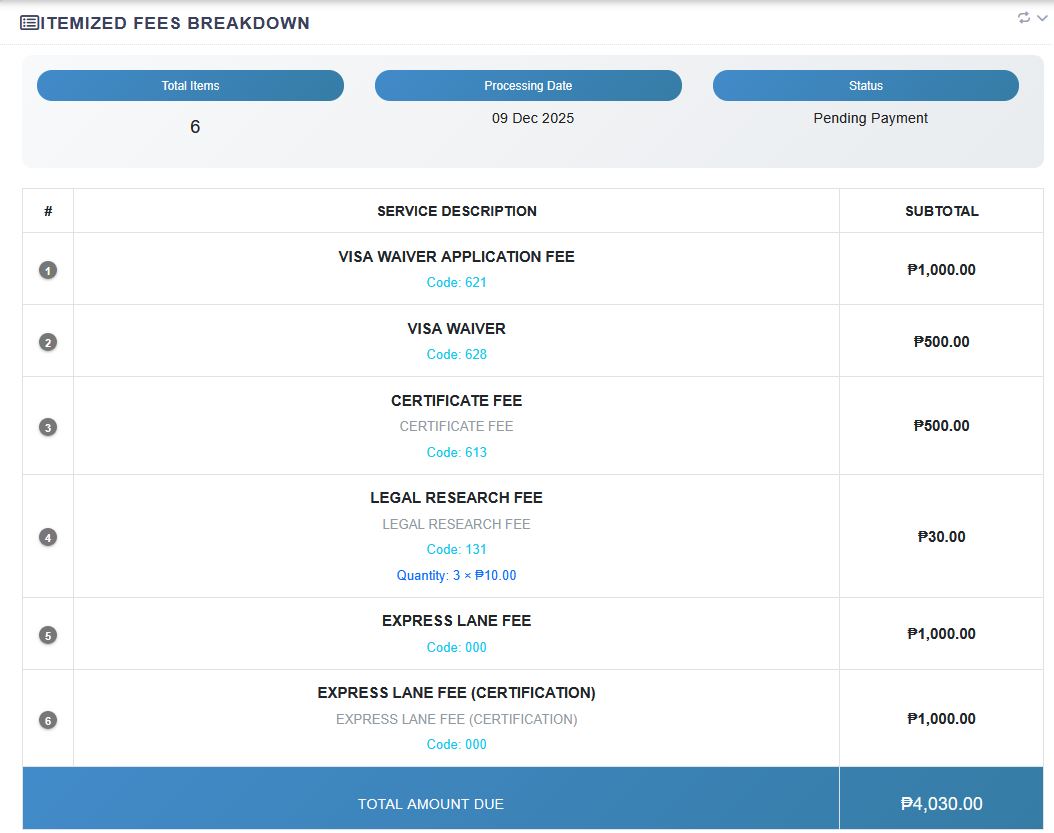
At first, you’ll see a price of 4,030 PHP, but this will increase slightly to 4,070.30 PHP once you select a payment method, due to the convenience fee for submitting your visa application online.
You can choose from the following payment options:
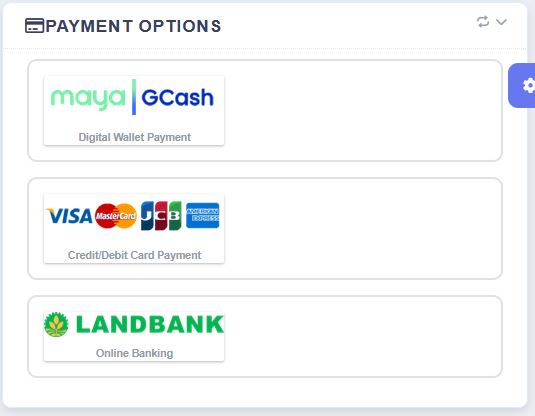
Enter the required details for your chosen payment method, and you’ll see a final summary of the total cost, including the convenience fee.
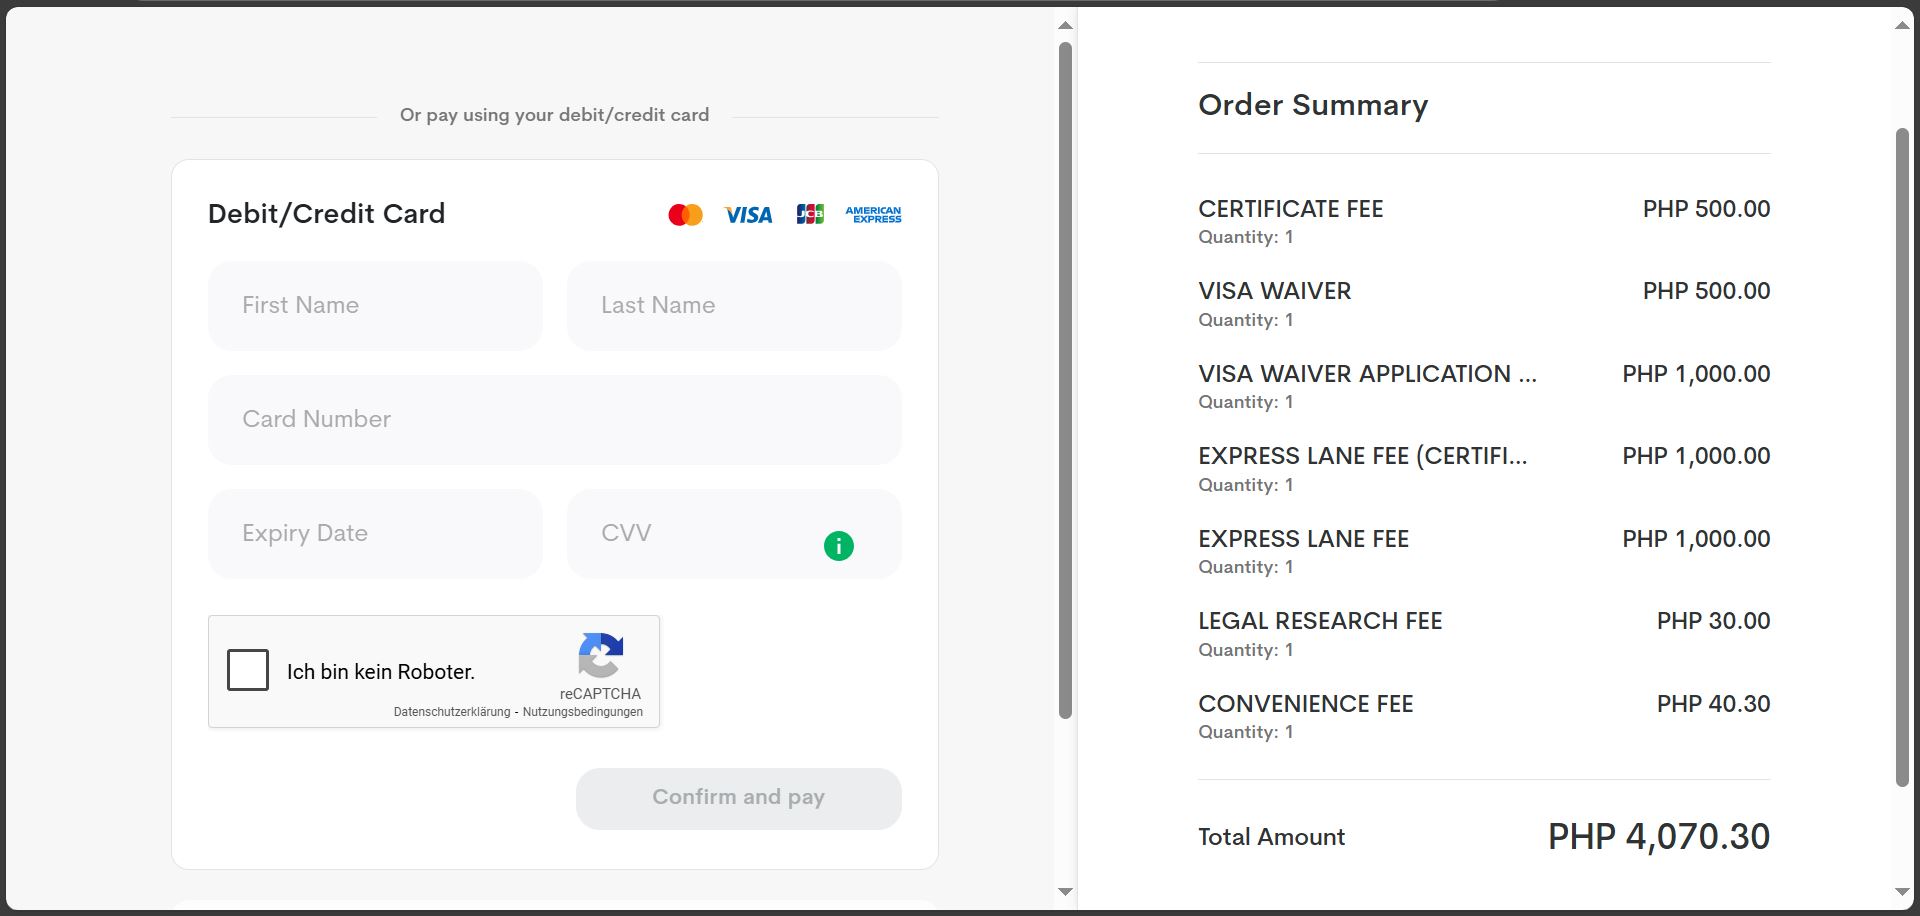
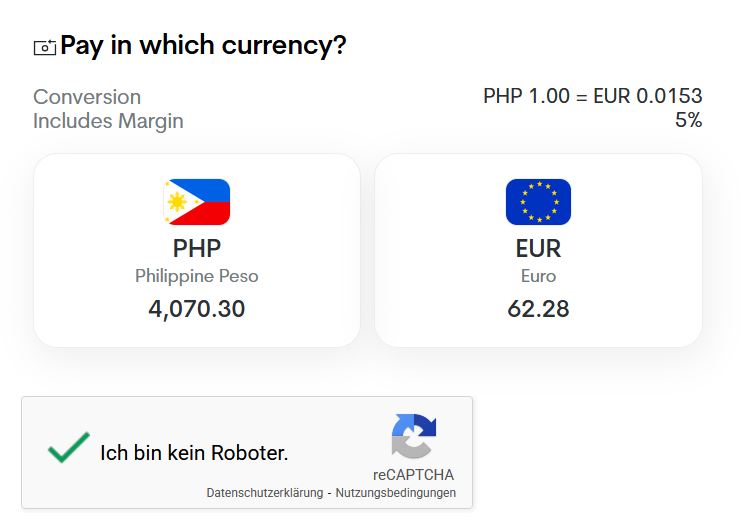
If you pay by credit card, you’ll also be asked whether you want to pay in Philippine pesos or in your card’s currency.
Once you’ve paid the total amount, you’ll receive an email with a payment receipt at the email address you provided during registration. This usually takes just a few minutes or a few hours. This receipt also serves as proof of your visa extension, and you should ideally keep a printed copy to show when you leave the country.
Unfortunately, the payment receipt does not show the new expiry date of your visa. To check this, log back into the portal and click on My Transactions. Here, you can also see the status of your visa extension, which will be either “For Releasing,” “For Evaluation,” or “Completed.” Once the status shows “Completed,” click on Actions on the right and then Details to view the date your visa has been extended to.